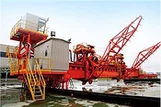
Hey there! As a supplier of Catenary Bucket Unloaders, I often get asked about how to replace the buckets in these machines. It's a crucial maintenance task that can significantly impact the efficiency and performance of the unloader. So, in this blog, I'm gonna walk you through the process step by step.
Why Replace the Buckets?
Before we dive into the replacement process, let's quickly talk about why you might need to replace the buckets in the first place. Over time, the buckets in a Catenary Bucket Unloader can wear out due to constant contact with the material being unloaded. This wear can lead to reduced capacity, increased spillage, and even damage to other parts of the unloader. Replacing the worn - out buckets can restore the unloader's efficiency, improve its performance, and extend its overall lifespan.
Tools and Materials You'll Need
First things first, gather all the necessary tools and materials. You'll need a set of wrenches, a hoist or crane (depending on the size and weight of the buckets), safety equipment like gloves and goggles, and of course, the new buckets. Make sure the new buckets are the right size and type for your specific Catenary Bucket Unloader.


Step 1: Preparation
Safety is always the top priority. Before you start any work on the unloader, make sure it's completely shut down and isolated from its power source. This includes turning off the electrical supply and any hydraulic or pneumatic systems. Also, make sure the area around the unloader is clear of any obstacles or debris.
Next, you'll need to access the buckets. This might involve removing some covers or guards on the unloader. Use the appropriate wrenches to loosen and remove the bolts holding these covers in place. Be careful not to lose any of the bolts or small parts.
Step 2: Removing the Old Buckets
Once you have access to the buckets, you'll notice that they are usually attached to the chain or belt of the unloader. The attachment method can vary, but most commonly, the buckets are held in place by bolts or pins.
Use your wrenches to loosen and remove the bolts or pins that secure the old buckets. If the buckets are stuck due to dirt or corrosion, you might need to use a little bit of force or a penetrating oil to help loosen them.
As you remove each bucket, be careful not to let it fall. If the buckets are heavy, use a hoist or crane to lift them out safely. Place the old buckets in a designated area for disposal or recycling.
Step 3: Inspecting the Chain or Belt
While the buckets are removed, it's a good idea to inspect the chain or belt that they were attached to. Look for any signs of wear, damage, or stretching. If you notice any issues, it might be a good time to replace the chain or belt as well. This can prevent future problems and ensure the smooth operation of the unloader.
Step 4: Installing the New Buckets
Now it's time to install the new buckets. Start by aligning the new buckets with the holes or slots on the chain or belt. Make sure they are properly seated and that the attachment points are lined up correctly.
Insert the bolts or pins through the holes in the buckets and the chain or belt, and then tighten them securely using your wrenches. Make sure the buckets are evenly spaced and that they are attached firmly to the chain or belt.
Step 5: Testing and Adjustment
Once all the new buckets are installed, it's time to test the unloader. Before you start the unloader, double - check that all the covers and guards are back in place and that everything is properly tightened.
Turn on the power supply and run the unloader at a slow speed for a few minutes. Observe the operation of the buckets to make sure they are moving smoothly and that there are no signs of excessive vibration or noise.
If you notice any issues, such as buckets not picking up the material properly or excessive spillage, you might need to make some adjustments. This could involve adjusting the tension of the chain or belt, or re - aligning the buckets.
Related Equipment
If you're in the market for other types of ship unloaders, we also offer a variety of options. Check out our Pneumatic Ship Unloader, which uses air pressure to unload materials. It's a great option for handling fine powders and granular materials.
Our Boom Jib is another useful piece of equipment. It provides flexibility in the unloading process, allowing you to reach different parts of the ship.
And if you're looking for a more fixed - type unloader, our Fixed Screw Ship Unloader is a reliable choice. It's designed for continuous and efficient unloading of bulk materials.
Conclusion
Replacing the buckets in a Catenary Bucket Unloader is a task that requires some time and effort, but it's well worth it in the long run. By following these steps, you can ensure that your unloader continues to operate at its best.
If you have any questions about bucket replacement or any of our products, don't hesitate to reach out. We're here to help you with all your ship - unloading needs. Whether you're looking to replace buckets, upgrade your equipment, or just need some advice, we've got you covered. Contact us today to start a conversation about your specific requirements.
References
- Industry best practices for Catenary Bucket Unloader maintenance.
- Manufacturer's manuals for Catenary Bucket Unloaders.